
One of the most important components in your PC, which you should definitely keep an eye on, is the graphics card. Now while running a GPU at high temperatures is generally not as dangerous to your PC as running the CPU at high temperatures can be, you certainly don’t want to let a GPU overheat in your PC.
If the GPU’s operating temperature exceeds its maximum safe limit, it will result in a thermal throttle, which significantly reduces the GPU’s performance in order to bring down its temperature.
So, here’s how you can check the GPU temperature in your PC.
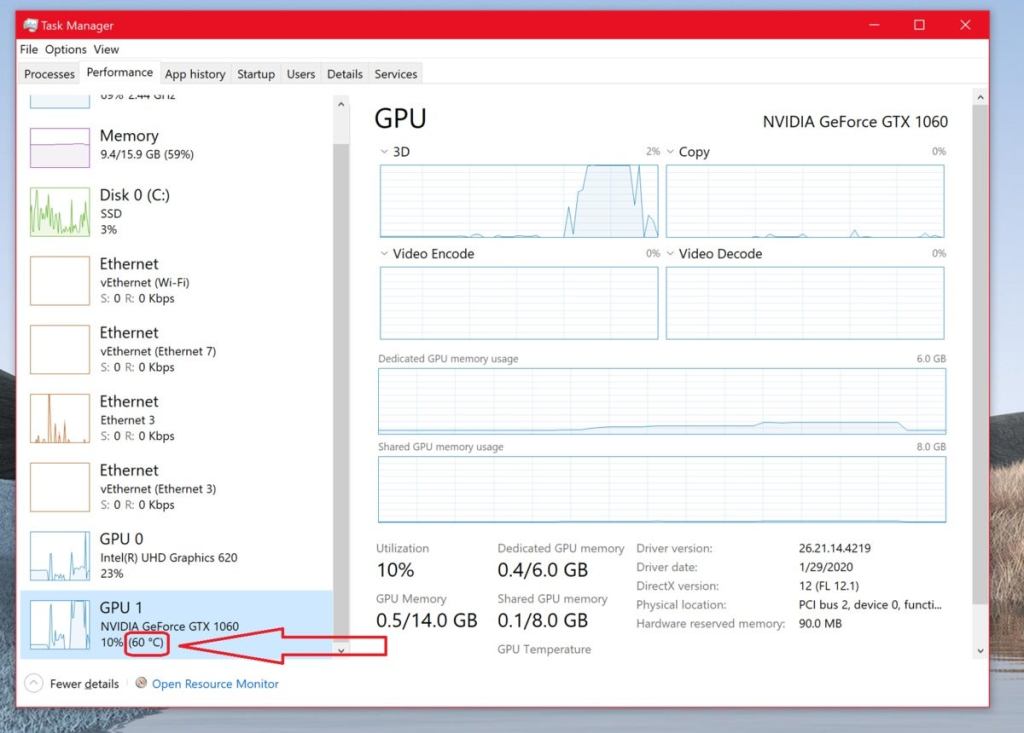
How to check GPU temperature using Task Manager?
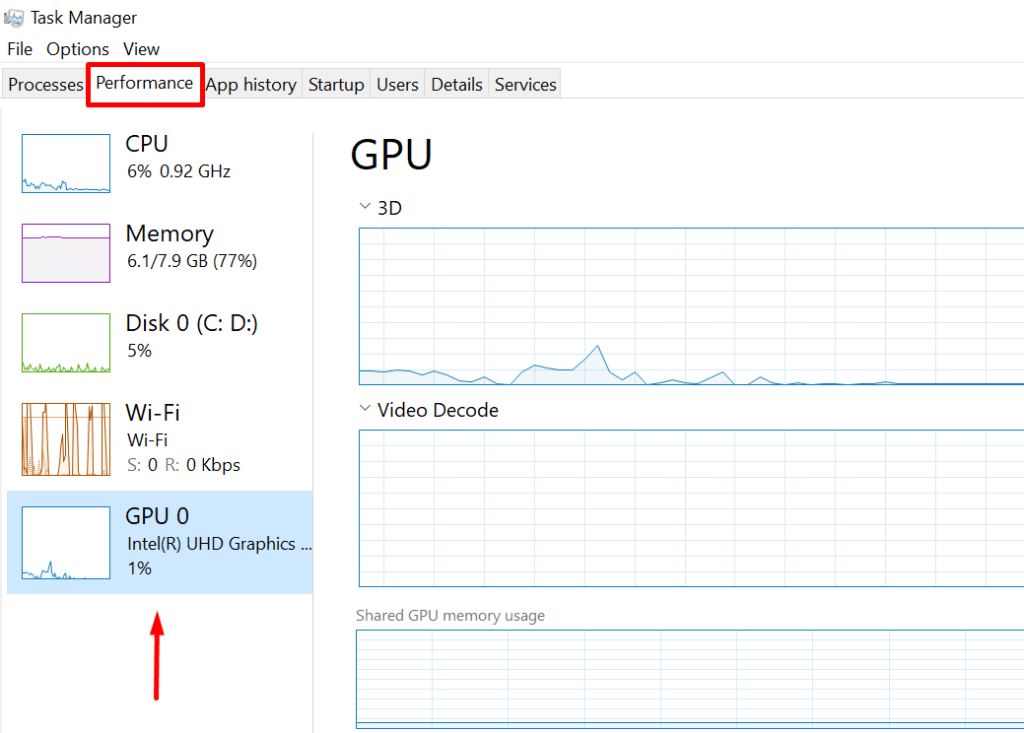
- To start Task Manager, either right-click on your taskbar or press the Windows key and the X key.
- In the Task Manager, go to the Performance tab and look for a GPU temperature; if you don’t see one right away, click on a GPU and then look for it. You’ll find it at the bottom of the detail window to the right (refer to the screenshot above).
- You can’t see your GPU temperature on the latest version of Windows, despite having the latest graphics drivers. This is usually because of a difference between feature additions between manufacturers.
How to check your graphics card’s temperature using third-party software
Here’s how to check the temperature of your graphics card in Microsoft Windows 10.
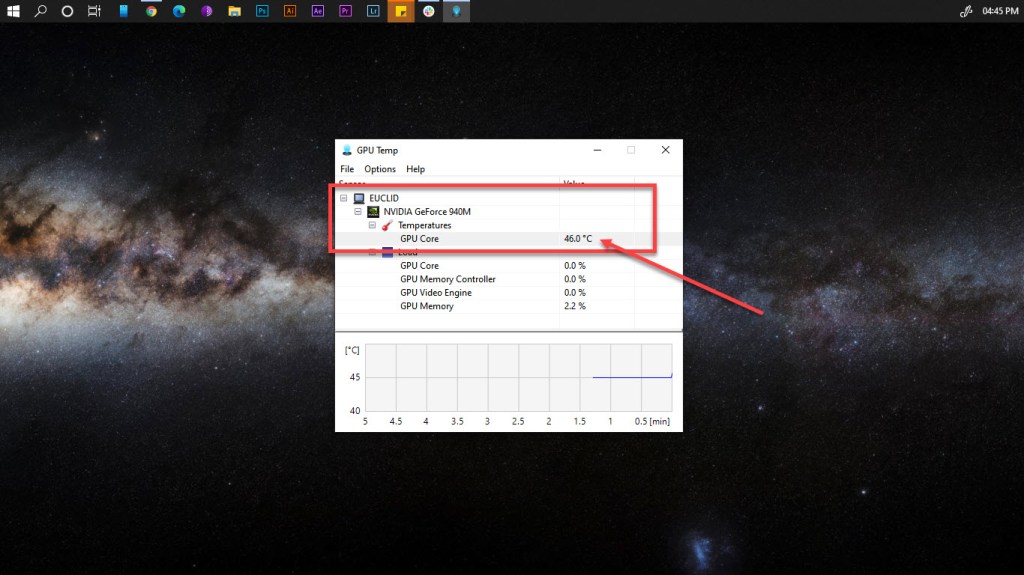
If you don’t see the GPU temperatures in your Task Manager, you’ll have to use third-party software like GPU-Z, HWiNFO, MSI Afterburner or GPU Temp. For the purpose of this article, we’re going ahead with GPU Temp.
Step 1: Go to the GPU temp website to down load the software.
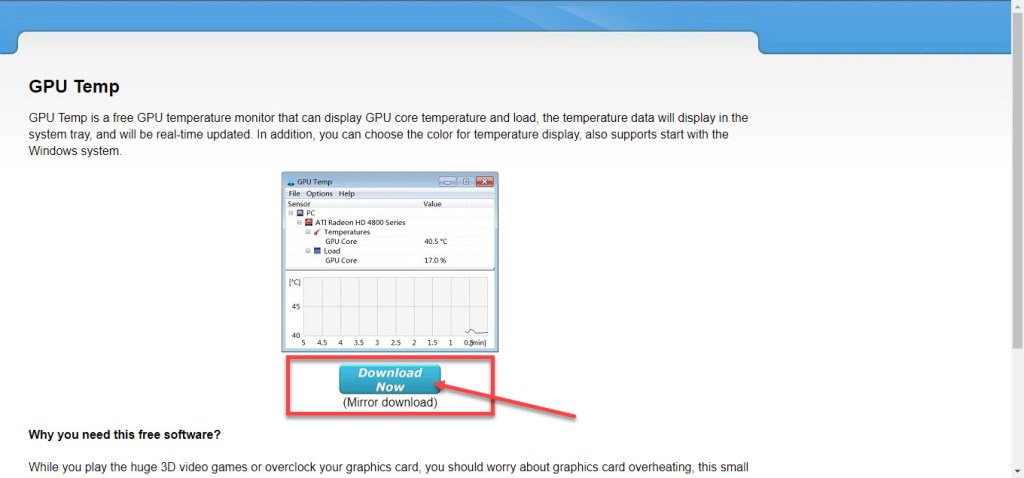
You can find the download link here
Step 2: Let’s run the EXE file we just downloaded. Keep an eye on the installation instructions.

Step 3: After you install it, running the software (as an administrator) will show you the GPU temperature and other basic information in real-time.